
 In the Onion Skin bar you can find the Inbetween Assist tool.
The Inbetween Assist allows you to find the middle of two images and place their onion skin images automatically in the middle according to the points that you set.

To use the assistant, tap on the button , you will then access a few options:


 Set one point for each onion skin image to determine the final position.
You then get a prompt at the top of the canvas: "Select a first point on sheet: -1" to set the point on the onion skin image that is before your current frame.
After setting your first point you get another prompt to set a point on the onion skin image after your current frame.
Every time you must set a point on an onion skin image, the image of the onion skin in question is more visible to facilitate the operation.
Finally, after setting the two points, set one last point as the destination of the inbetween image.
 Set two points for each onion skin image to determine the inbetween image.
With this option, you must set two points for each image, allowing you to add more information with the size and rotation of the final image.
Finally, after setting the 4 points, set 2 last points to determine the final position, size and rotation of the inbetween.
 Enable this option to access the edit mode after setting the points.
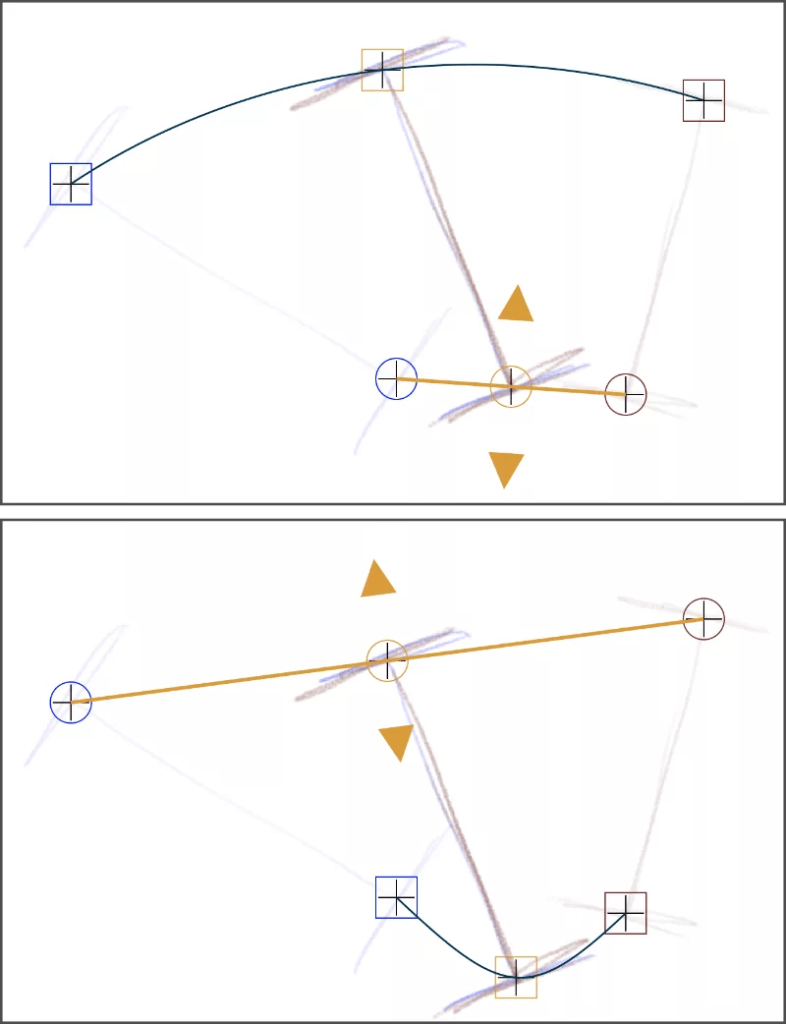
The edit mode allows you to apply a curve to set an arc for your inbetween, and to determine another position than the middle of the arc.
You can also change the position of the points that you set before.

Drag one of the arrows to increase the curve of the arc on one side or the other.
 Use the magnet to snap between 1/2, 1/3, 1/4, 2/3, and 3/4 for the distance between the 2 points.
When the magnet is disabled, you can move freely on the arc without snapping.

 When you have 2 points for each drawing, you can choose to switch between the 2 other points of the total 4 origin points.
This will allow you to switch the points from which you can control the arc with the arrows, the other arc will automatically follow the logic of the one you can change.
 This option shows that you are creating an inbetween image in the smallest angle between the two points.
 This option shows that you are creating an inbetween image in the largest angle between the two points.
